
07: A Mazing Puzzle (Part 1)
 Learning Target
- Import meshes into Unity
- Use the snap feature of a Unity scene
 Resources
Puzzle Block Models:
⭐ Puzzle Blocks for Multiple Levels:
 Instructions
Step 1:
Create a new Unity project called A Mazing Maze (or something similar).
Step 2:
Import the maze blocks into Unity:
-
- Create a folder in Assets called "Models"
- Download the archive files in the Resources above
- Unzip the archive files
- Drag and drop the files into the Models folder inside of Unity
Unity will automatically create objects for each block for you to use, but we'll create prefabs of each block in a future step. However, the blocks will import with a 90 degree rotation since Unity and Blender use different "UP" axes.
Step 3:
Create a new folder in your assets called "Prefabs". Drag each of the blocks into your scene. Re-orient each block and then drag them back into your Prefabs folder. This will create a new Prefab for each block with the correct orientation.
Step 4:
Create a new folder in your assets called "Materials". Create new materials for your walls and floors. Then, you can apply these materials to each of your prefabs. You are not required to use the same materials for each prefab.
Step 5:
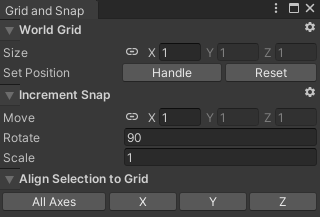
Change the snap settings of Unity so that you can more quickly place the maze blocks.
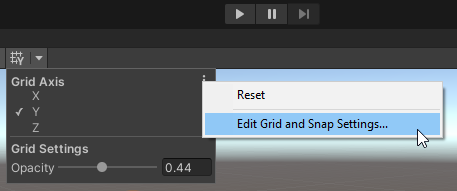
I set my Move grid to 1 and my Rotate grid to 90, but other values may work for you.
Step 5:
Use the tiles to create a maze. Be sure to review the grading criteria listed below.
 Grading
For grades A to D, all requirements need to be met for that grade band.
| Tiles | Correct Pathways | Minimum Incorrect Pathways |
Minimum Materials | Minimum Rooms | Letter Grade |
| >40 | Up to 3 | 8 | 8 | 5 | A+ |
| 30 | Exactly 1 | 5 | 5 | 2 | A |
| 25 | Up to 3 | 4 | 4 | 1 | B |
| 20 | At least 1 | 3 | 3 | 0 | C |
| 15 | At least 1 | 2 | 2 | 0 | D |
| <15 | None | <2 | <2 | Reassigned |
All mazes need a clearly marked start and finish tile.
Correct Pathway: a path that connects the start and end tiles together
Incorrect Pathway: is a dead end or requires retracing steps to reach the finish.
Materials: materials are not considered different if they cannot be easily distinguished from each other
Room: at least 12 tiles of continuous floor space surrounded by walls. Rooms must be at least 3 tiles wide at their narrowest point. The walls can have up to 1 doorway for every 6 tiles of floor space.