
20: All of the Lights
 Learning Target
- Use 3- or 4-point lighting to illuminate a scene
- Use a variety of material types such as metal, glass and/or textured surfaces
 Blender Tips
Blender has 2 different render engines. Each treats light very differently. If you want the most realistic scene appearance, Cycles engine is the best option.
However, cycles is a more processing intense renderer. To improve speed in Cycles, you'll want to enable CUDA processing on your graphics card:
When using Eevee, you may need to adjust material properties to get a suitable result.
 Concepts
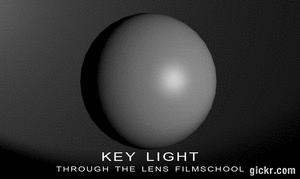
3-Point Lighting
A common lighting technique in photography and movies uses 3 lights to illuminate a scene:
-
- Key Light: Primary light source of the scene
- Fill Light: Prevents shadows from being too dark
- Rim Light: separates the object from the background
Diagram: 3_point_lighting.svg
Animation: 3-point-lighting.gif
Note about Cycles: When rendering mirrors or glass in Cycles, you likely won't need to make changes to render settings. Cycles will try to render any material type using the inherent properties of light rays.
 Instructions
-
Note: This project will be evaluated using the rubric. Be sure to take a look!
Step 1:
Download the template file to begin. Be sure to save it in your H: drive.
Template for Blender 4.x 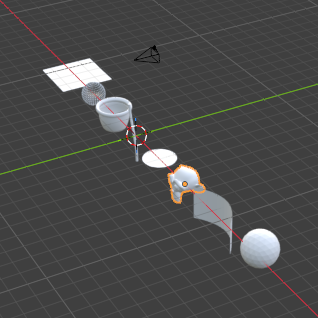
Step 2:
Making materials look good requires some careful lighting. Add 3 spotlights to your scene and arrange them in a 3-point configuration.
Step 3:
Arrange the items in your scene to create the most visually pleasing, striking, or interesting renders possible.
You may:
- Move, Rotate or Scale
- Change materials or add textures
- Duplicate or mirror existing objects
- Do anything else that can be completed while still in Object Mode.
-
You may not:
- Add new objects to the scene
- Delete or hide the original objects from the camera
- Modify the shapes of the original meshes
Save your Blender project whenever you do a major step using CTRL+S. You don't want to lose any work!
Step 4:
Add materials to the objects in the scene. You should include multiple material types (see the rubric). Here are examples:
- Solid color
- Metallic
- Glass
- Mirror
- Emission
- Textured
Step 5:
When you are happy with the result, follow these steps:
- Press NUM0 to enter Camera view (unless you're already there)
- Press F12 to render the scene to an image
- Save the image by pressing ALT+S to save the render
You can also use the menu: Image-->Save
Extension:
Glass and metal don't look very good when there isn't something around them. To make your final render "pop", you will need to add an HDRI environment texture to your scene.
 Grading
Refer to the rubric below for grading criteria. There are 12 points possible on the rubric, but 10 is considered a full score.