
22: The Clawbot Code Project
 Learning Target
- Use block-based coding to control the drivetrain of a physical robot
- Use block-based coding to control manipulators of a physical robot
 Resources
Code V5 Website:
https://codev5.vex.com
Downloading Code to a Robot:
https://www.youtube.com/watch?v=uHnZ1Qj5QqM
Testing the Inertial Sensor:
https://kb.vex.com/hc/en-us/articles/360053918032-Understanding-the-Alignment-of-the-V5-Inertial-Sensor
 Instructions
The Inertial Sensor
For your code to work well in the real world, you will want to ensure the inertial sensor is working properly. The closer it is mounted to the center of the robot, the more predictably it will behave. 
Before mounting, you may want to test the inertial sensor to see if it is not properly calibrated. You can also do this after it is mounted, but it is just a bit more effort since you need to move the robot around a lot.
You can test your inertial sensor using these instructions:
https://kb.vex.com/hc/en-us/articles/360053918032-Understanding-the-Alignment-of-the-V5-Inertial-Sensor
You don't need to calibrate it unless it isn't showing correct information.
Note: Each member of the group will create their own code for this assignment!
Step 1:
The V5 Robot Brain has built in code for driving with the joystick.
However, this code has limited protection against destroying the arm or claw motors. It also won't work if your wiring is different than the instructions.
For this assignment, do NOT drive with the joystick. You will need to control the robot using code.
Create a new V5 project and rename it to Clawbot Setup - MyName - Team X. (Use your actual first name and team letter)
Step 2:
Setup a drivetrain for your robot by opening Devices:
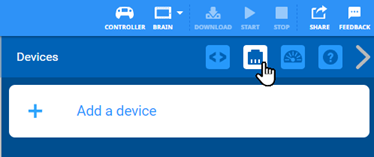
Add a 2 motor drivetrain and configure it properly:

Choose these options:
-
- Ports for left and right drive motors
- Port for an Inertial Sensor

Step 3:
Now we need to configure some settings for the drivetrain so that it drives and turns as accurately as possible.
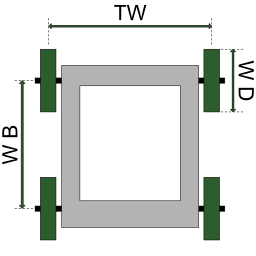
We need to measure these physical characteristics of the drive with a ruler:
-
- Wheel diameter (WD)
- Track width (TW)
- Wheelbase (WB)
- Gear Cartridge
- You will see a color (red, green, blue) visible near the motor output
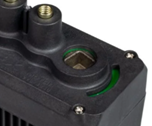
- You will see a color (red, green, blue) visible near the motor output
- Gear ratio
- The ratio of wheel turns to motor turns
-
- Which direction is forward relative to the brain?

Video help for this step: https://www.youtube.com/watch?v=JGGtvVNTGJw
Step 4:
Add a new motor for the arm.

Choose these options:
-
- Port for the arm motor
- Change the motor name to ArmMotor
- Change the names forward/reverse to up/down
Note: You can later change Normal to Reverse if the arm is moving backwards

Video help for this step: https://www.youtube.com/watch?v=9CyUf0UdTgM
Step 5:
Add a new motor for the claw.

Choose these options:
-
- Port for the claw motor
- Change the motor name to ClawMotor
- Change the names forward/reverse to open/close
Note: You can later change Normal to Reverse if the claw operates backwards

Step 6:
Write code that checks the operation of each of these:
-
- Drivetrain
- Arm
- Claw
IMPORTANT:
-
- Add a timeout before each operation so that you don't accidentally burn out a motor or have the robot take off on you when you test it for the first time.
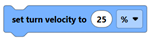
Drivetrain: 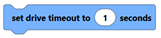
Motors:
-
- Slow the motor speed so it will not tear things up if it gets forcibly stopped
Drivetrain: 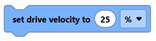
Motors: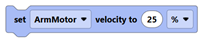
Step 7:
Have the teacher double-check your code for safe operation before continuing...
Step 8:
Place your robot in a safe location with the wheels not touching the ground.
Download your code to your robot and then run it. (video tutorial)
Step 9:
If things move the wrong direction, then reverse the direction of the motors.
After you've verified that things move the correct directions, take a screenshot of the device panel for each of these:
-
- Drivetrain
- ArmMotor
- ClawMotor
Step 10:
Use Save As to save your project to your H: drive.
Take a screenshot of your complete code.
Submit the required files for this assignment (see below).
Extension:
There are other ways to protect the motors of your robot. One method is to stop your motors automatically when you detect a rise in applied current or torque.
This example code block is designed to give you ideas, but it will likely need some changes or adjustments to work properly. It lowers the max applied torque so we don't burn out the motors while gripping something.
