
08: Extending the Platform
 Learning Target
- Modify an existing GDevelop game
- Duplicate objects to create new instances
- Add new objects to a GDevelop game
 Instructions
Step 1:
Open the GDevelop editor from the desktop or the Windows search bar.
Step 2:
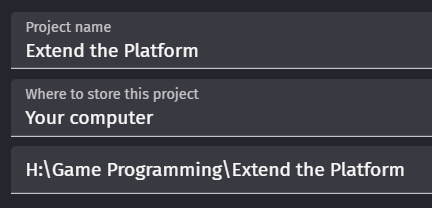
If you keep saving games into your H: drive, it will become an extreme mess of overlapping projects and files.
-
- Go to your H: drive
- Create a new folder for this course
- Create a new folder inside this for each assignment
Always create new projects inside a new folder to avoid cross-contamination of game assets.
For example:
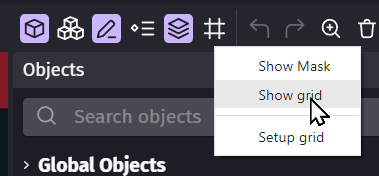
Step 3:
Turn on the Snap Grid. This will make it easier to move things precisely. You can turn it off at any time, if needed.
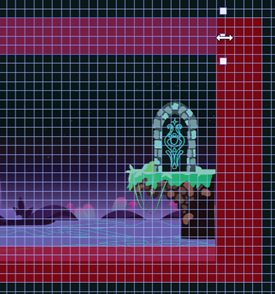
Step 4:
Let's extend the level. Move the right boundary further to the right. Don't worry about the exact distance.

Step 5:
Move the end of the level elements to the new edge of the level.

Then, click on the background and resize it to fill the new scene boundaries.
This is a tiled sprite and so it will automatically draw new copies of itself.

Lastly, be sure to extend the top and bottom boundary sprites.
Step 6:
Extend the level by completing at least these steps:
-
- Add 10+ new instances to the scene by dragging them from the Objects Panel.
You can also copy-and-paste from those already in the scene if you prefer.
- Add 10+ new instances to the scene by dragging them from the Objects Panel.

-
- Be creative with your new objects. Don't just repeat patterns that already exist in the scene.
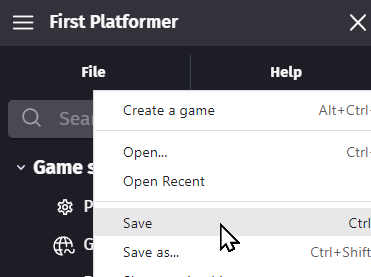
Step 7:
Save your game by pressing CTRL+S or using the File menu:
Step 8:
Test your game by using the Preview button that looks like this:

Notice that we saved your game first. You don't want to lose your work if the game crashes!
Step 9:
Make any changes that you think are needed. Then, save your project again. Repeat this process as needed.
Possible Extensions
Customize the game further by:
-
- Adding new objects to the game
- Adding special effects
- Changing behaviors of objects (save before doing this)
- Creating a new level (advanced)