
12: Abstract Art
 Learning Target
- Assign different materials to different faces of a shape
- Use the subdivide, rip and knife tools
- Add new faces to a mesh
 Blender Reference
Common keystrokes for edit mode:
| TAB | Toggle edit mode |
| 1 | Vertex mode |
| 2 | Edge mode |
| 3 | Face mode |
| E | Extrude |
| I | Inset |
| CTRL+B | Bevel |
| CTRL+R | Loop Cut and Slide |
| F | New edge or face |
| V | Rip |
| K | Knife |
Common keystrokes for selection:
| A | Select all |
| B | Box select |
| C | Circle select |
| ALT+A | Select none |
 Instructions
Step 1:
Open a new Blender project and save it with a useful name (such as "Abstract Art").
By saving immediately, Blender will auto-save your project every 2 minutes so that you can recover it if your computer crashes. However, you should still save whenever you do a major step (CTRL+S) to avoid losing work.
Step 2:
For this assignment you will create an abstract geometric sculpture. Your sculpture should represent a real world object, but it should only use flat faces and geometric patterns to achieve this result.
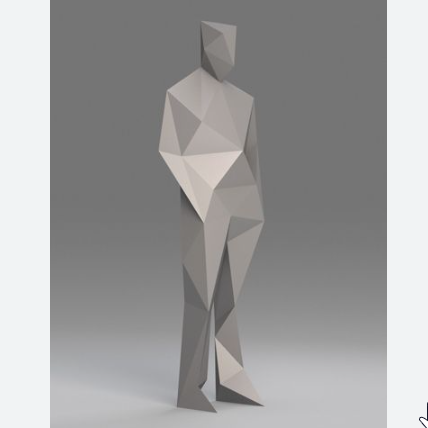
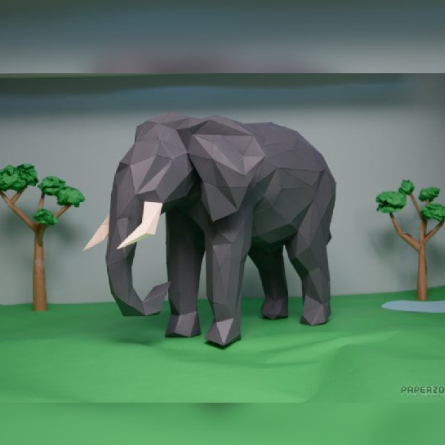
Here are some examples:
| Basic | Intermediate | Advanced |
 |
 |
 |
Choose ONE of these as the starting point for your geometric sculpture:
- Cube
- Cone
- UV Sphere
- Icosphere
- Cylinder
- Cone
- Torus
Important: Your starting shape should have fewer than 20 total faces.
You can change the number of faces on a sphere, cone, cylinder or torus when you add it.
Note: The Add Mesh settings will disappear as soon as you do anything else to your scene. Change them immediately!
Step 3:
Use the TAB key to enter Edit Mode.
Use these edit mode tools when creating your sculpture:
- Knife
- New Edge/Face
- Rip
- Subdivide
You may also use these tools, but avoid using these as much as possible:
- Extrude
- Inset
- Bevel
- Loop Cut & Slide
Remember, you're sculpture should be a geometric representation of something real, but it should be abstract (gives the impression of something, but is not an exact representation).
Step 4:
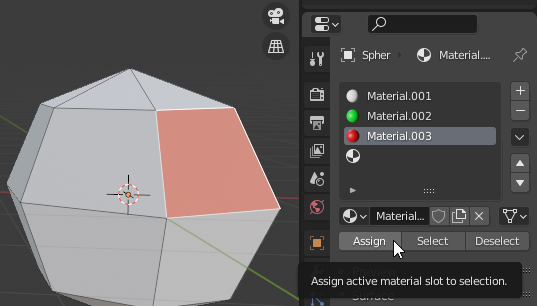
Your final sculpture should be a single object. However, it will also be multicolored. To achieve this, you need to add multiple material slots in the Material Properties tab.

Click the  to the right of the materials list to add empty slots for new materials. Then, click New to create a new material for each slot.

Assign materials to faces of your sculpture from within Edit Mode. Select a face, select a material slot and then click Assign.
Step 5:
Save your Blender project using CTRL+S or the menu: File-->Save
Always save before going to the next step. Though it doesn't happen often, the next step can potentially cause Blender or your system to crash.
Step 6:
When you are happy with the result, follow these steps:
- Press NUM0 to enter Camera view (unless you're already there)
- Press F12 to render the scene to an image
- Save the image by pressing ALT+S to save the render
You can also use the menu: Image-->Save
 Grading
| Your submission... | Your grade... |
|---|---|
|
Extended
|
A+ |
|
Exceptional
|
A |
|
Good
|
B |
|
Reasonable
|
C |
|
Needs Improvement
|
D |
|
Insufficient
|
F |
| Scores may be rounded to the nearest whole number. | |