
16: Automated Art
 Learning Target
- Write a program that draws the same shape in different locations
 Instructions
Step 1:
Open a new CTE Arm project. Rename and save the project with a name that includes the assignment and your name (e.g. JaneSmith_ArmArt).
Step 2:
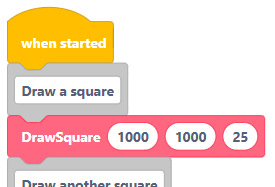
Create a custom block that will draw a square at any location you choose.
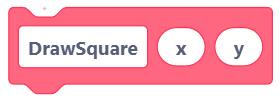
You will need to use a combination of absolute and relative movements to make this work efficiently.
Step 3:
Write a program that draws squares in at least 5 different locations. Your main program can only include comments and as many of your custom blocks as you need. Here is an example:
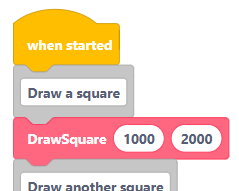 TIP: Don't use these coordinates. 😉
Test your code on your arm to make sure that it works as intended.
Step 4:
📸Take screenshot #1 of your code before continuing.
Right-click on your custom code block and choose Edit.
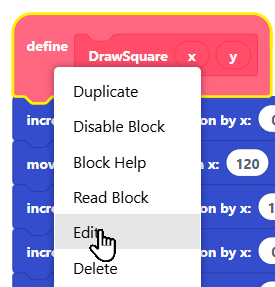
Add another parameter to your custom block for the size of the square to draw.
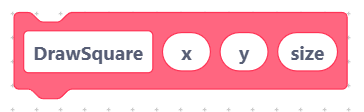
Then, update your code so that it draws squares of the size that is given.
Step 5:
Write a program that draws differently-sized squares in at least 5 different locations. Your main program can only include comments and your custom block.
 TIP: Don't use these coordinates. 😉
Test your code on your arm to make sure that it works as intended.
Step 6:
📸Take screenshot #2 of your code before continuing.
Let's try some automation!
We can choose random sizes and locations using the pick random block.

And, we can repeat things as many times as we wish using the repeat block.
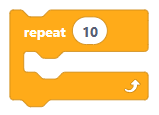
Write code so that your robot arm draws 20 squares of random sizes in random positions.
Test your code on the arm.
Step 7:
📸Take screenshot #3 of your code.
📸Take a picture or video showing the final results of your robot arm program.