
05: Connect to VEXCode VR Class
 Learning Target
- Create a VEXcode blocks project
- Run a robot simulation
- View the Python code created by code blocks
 Resources
 Instructions
Step 1:
Use this link to access our Premium license for VEXcode VR:
https://vr.vex.com?classcode=GZXJUX
You should see a gold VR icon (NOT red) in the top corner of the screen if you have enabled the premium features:
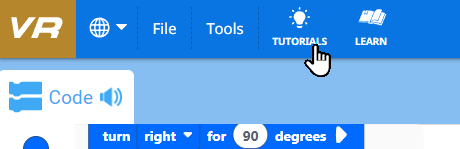
Step 2:
Choose the tutorials icon at the top of the screen:
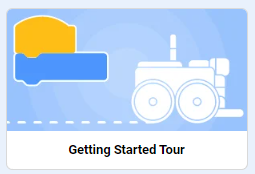
Choose Getting Started Tour from the list:
Complete the interactive tutorial.
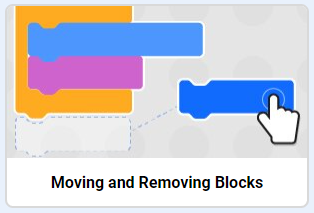
Step 3:
Click the tutorials icon at the top of the screen and choose Moving and Removing Blocks from the list:
Step 4:
Add blocks to your workspace to make a robot do the following:
-
- set the pen color (red, green or blue)
- set the pen width to wide
- drop the pen down
- draw a square
- raise the pen up
- move to a new location
- change the pen color (purple, cyan or orange)
- drop the pen down
- draw a different enclosed shape
Extra Challenge: Add a third enclosed shape different from the first two with at least 6 sides
Be sure to test your code frequently to make sure you are on the right track!
Step 5:
Run your project.
Take a screenshot of your robot's drawing:
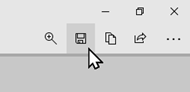
-
- Press this keyboard combination: ⊞ + SHIFT + S
- Click on the notification
- Save the image using the disk icon
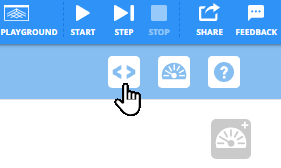
Step 6:
Open the Code Viewer:
Take a screenshot of the Python code.