
📓 Using LDtk with GDevelop
Các yêu cầu hoàn thành
 Learning Target
- Use a map editor to create tile-based levels for a game
 Resources
🎥 How to import LDtk into GDevelop 5
 Tutorial
Step 1:
-
- Create a folder for your map project.
- Create a new LDtk project and save it into the folder you created.
Step 2:
-
- Find a tileset that you would like to use to create your map.
- Save the tileset image into the same folder as your LDtk project.
Step 3:
-
- Go to the Tilesets tab in LDtk

- Click the add button and choose the tileset image you want to use
- Give the tileset an identifier
- Set the tile layout size
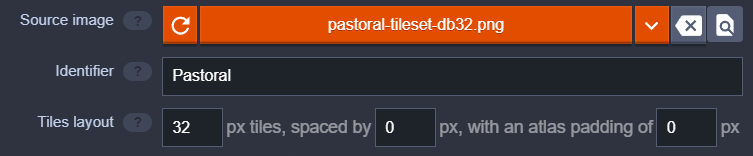
- Save your project! (CTRL+S)
- Go to the Tilesets tab in LDtk
Step 4:
-
- Go the World View
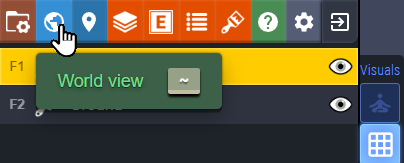
- Set the size of your level. Be sure it is a multiple of your tile size.
- Set the background color or image of your layer
- Save your project
- Go the World View
Step 5:
-
- Go to the Layers tab in LDtk

- Click the add button
- Create a new tile layer (or, you can watch the tutorial and learn some more advanced usage)

- I called my first layer "Ground"
- Add another layer
- I called my second layer "Buildings"
- Save your project
- Go to the Layers tab in LDtk
Step 6:
-
- Choose your bottom layer
- Add the basic ground and terrain to your level
- Switch to the upper layer
- Add the buildings and other structures to your level
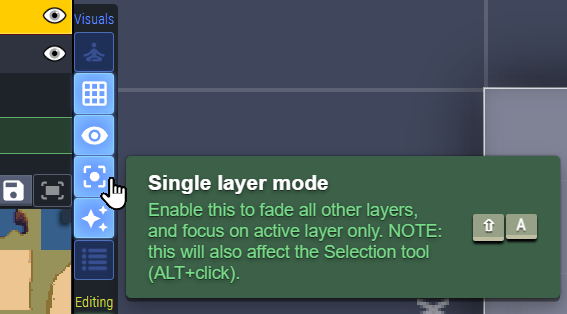
Hint: Sometimes, people will place things on the wrong layers accidentally. You can avoid this by turning on Single Layer Mode.
Step 7:
-
- Go to the World View
- Click the button to create a new level
- Create the next level by clicking on the correct location in the view
- Pick the desired spot for the new level
Sửa lần cuối: Thứ Ba, 2 tháng 6 2026, 9:59 AM